Execute Any Document Button
This optional feature allows you to create a single button that allows users to click and select any document action on a base object without creating a custom button for each Document Action. You can also assign document actions to a specific group, which allows the user to filter document actions listed. Group names are fully customizable. If you have more than 1-2 buttons on an object, we recommend configuring the Execute any Document Action feature.
- Create a Custom Button
- Customize the Button Code
- Add Button to Page Layout
- Customize Group Values
- Use the Button
Create a Custom Button
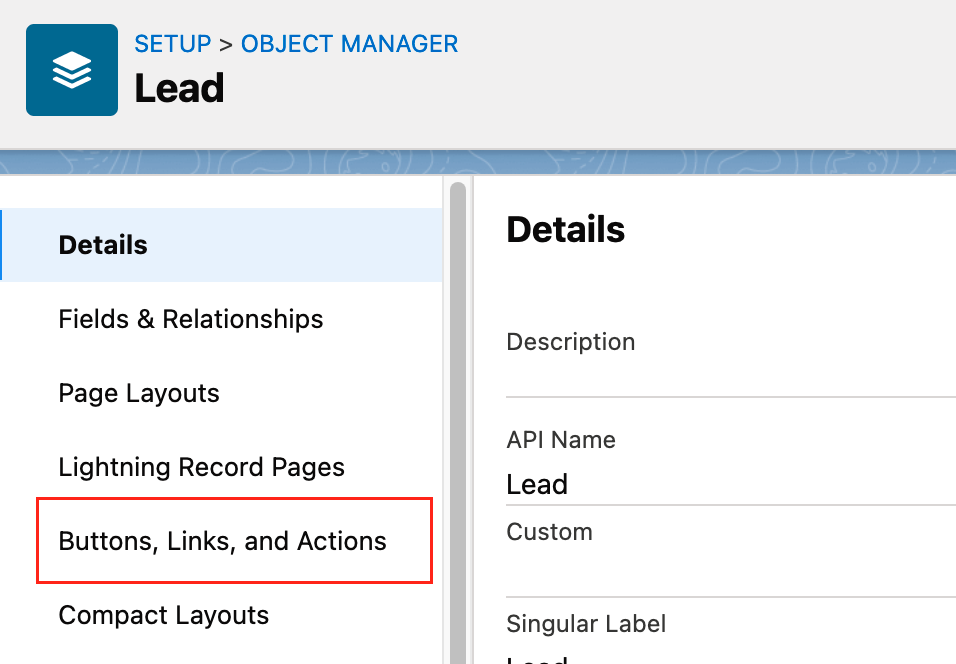
Go to your base object and click “buttons, Links, & Actions”
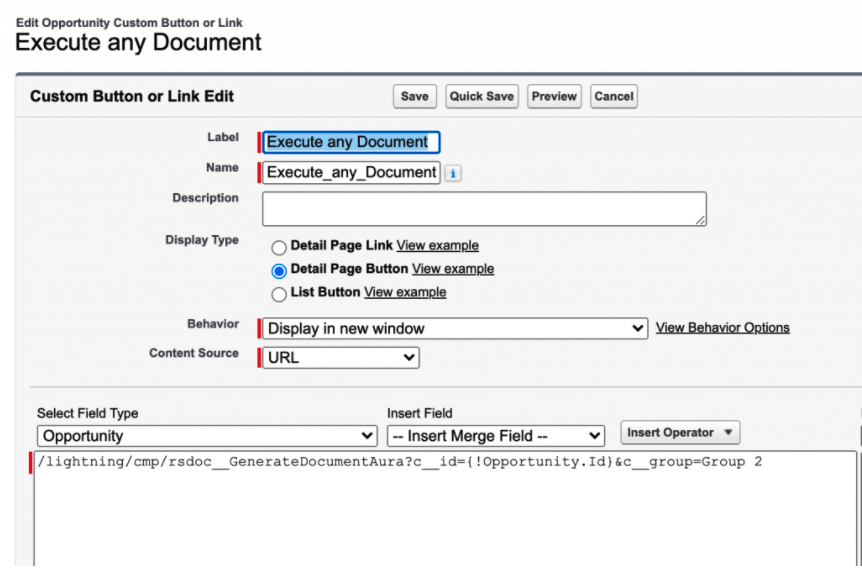
- Choose a name for your button
- Set the Display Type to either Detail Page Button or Detail Page Link.
- Set Behavior to your preference – we recommend Display in new window
- Set Content Source to URL
Customize the Button Code
Paste the following URL in the box: “/lightning/cmp/rsdoc__GenerateDocumentAura?c__id={!BaseObject.Id}&c__group=Group Name“. You’ll replace “BaseObject” with the base object being used in the Document Action.
An optional way to further customize the button is to define the Group Name parameter (c__group=) in your button code. Default values for groups are Group 1, Group 2, and Group 3 , but you can customize the Group values to be anything you want (see next section for steps).
The example button code below shows a button on the Opportunity object and Group Name parameter set to “Group 2”:
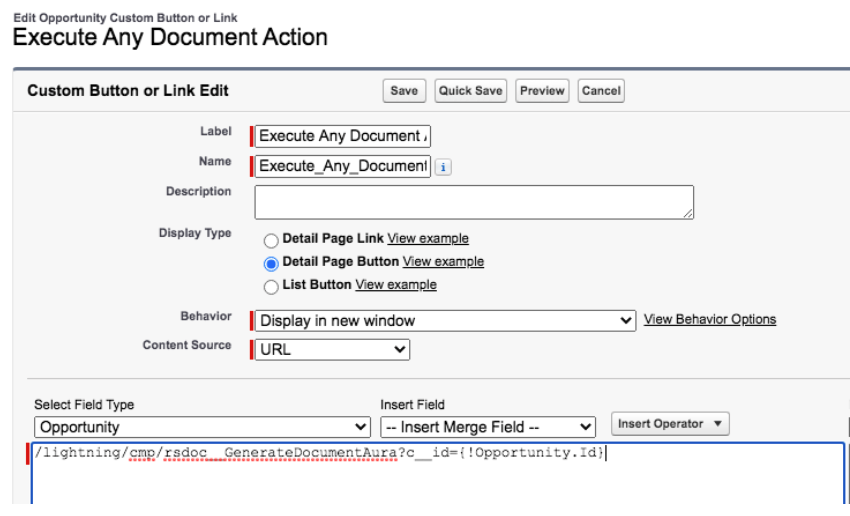
If you do not want to specify a group in the action button, you can remove the Group Name parameter. The example code below shows button code for base object Opportunity and no default Group Name parameter:
Add Button to Page Layout
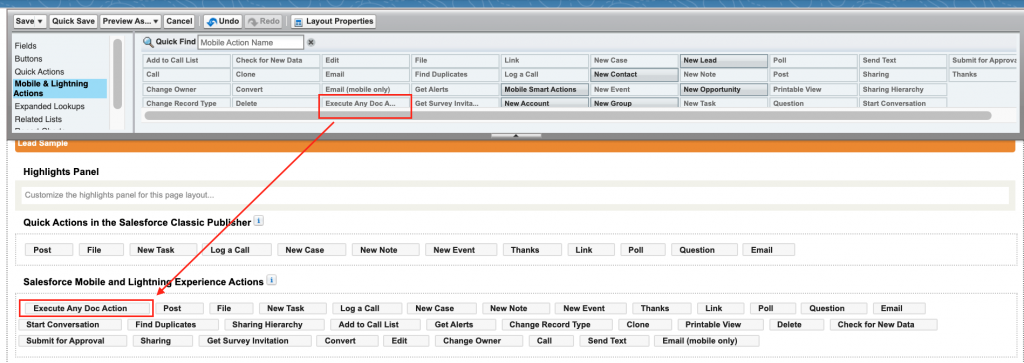
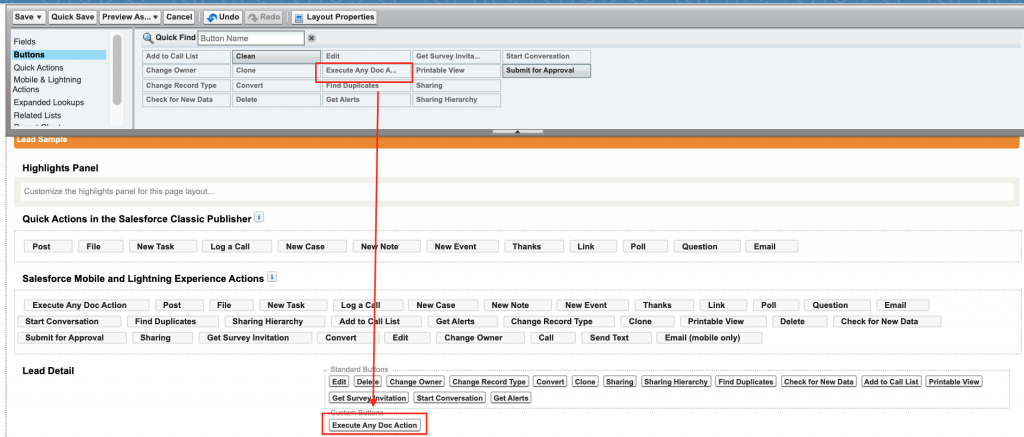
Once done customizing the button, you’ll need to add it to the base object page layout. Navigate to Setup > Object Manager >Object Name>Page Layouts and select desired page layout to edit, then drag the button to the page layout.
Lightning:
Classic:
Customize Group Values
To customize Group values, go to Setup > Object Manager > Document Action object > Fields & Relationships > click the “Group” field to edit.

Under “Values” section you can edit existing Group values or add new values. If you want a value to be the default, select the “Default” checkbox.

For example, the groups in the screenshot below have been customized to reflect key stages in a Lead conversion process.

Each Group has several associated Document Actions to choose from, listed in alphabetical order.

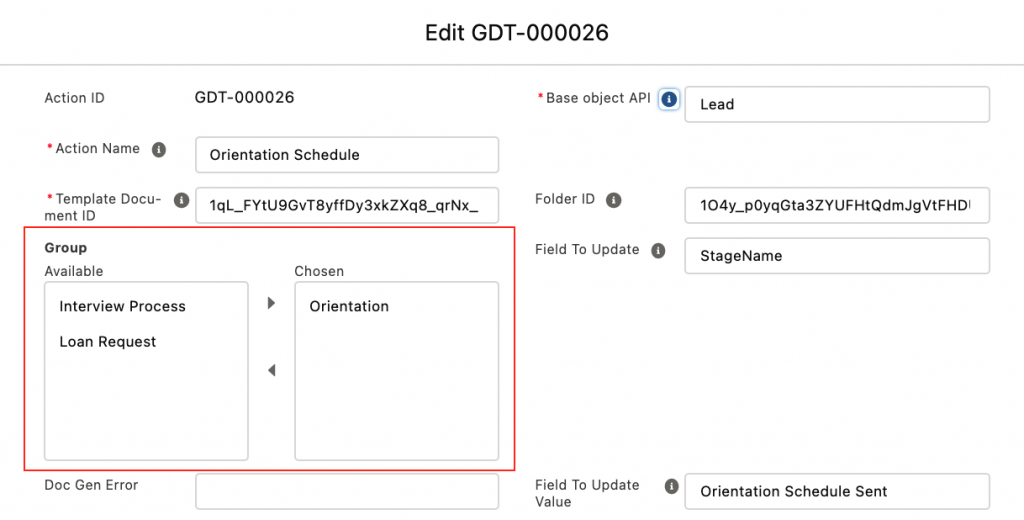
Add the Document Action to Group(s)
Use the arrows to choose Group(s) based on any criteria, such as functionality or business process. You can add a Document Action to more than one group.
Use the Button
Once the button is ready, go to a record on the base object and click the button to then select a Group and Document Action. The “Select a Group” feature is optional. If you leave the Group field blank, all Document Actions for the base object will be listed in the drop down list. If a Document Action hasn’t been assigned to a specific Group, it will only be visible in the unfiltered “Select a Document Action” list.
Group filter selected:

No Group filter selected:

